
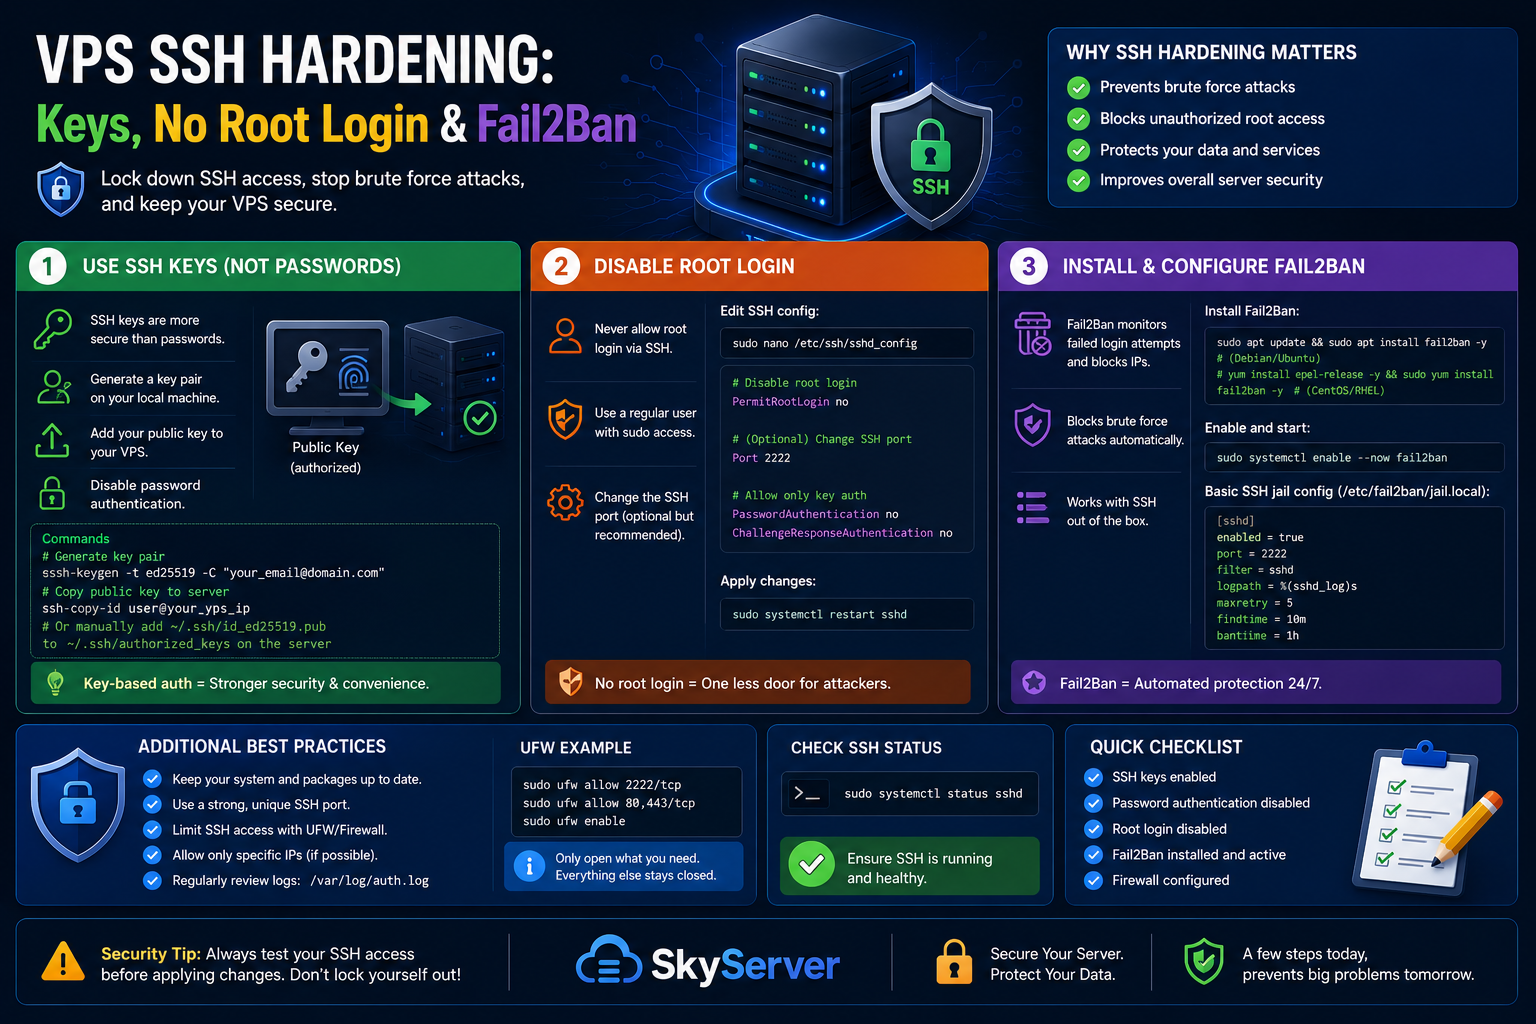
If you've ever run tail -f /var/log/auth.log on a fresh VPS, you already know the problem: within minutes, bots from all over the world are hammering port 22 trying root/admin/password123. Most of these attempts go nowhere, but "most" isn't good enough when it's your server. This guide walks through the four changes that actually move the needle — SSH keys, no root login, a non-default port, and Fail2Ban — in the order you should make them so you never lock yourself out.
Symptom: Constant Login Attempts, Or Worse, a Compromised Account
Two situations bring people to this guide. The mild one: you check /var/log/auth.log (Debian/Ubuntu) or /var/log/secure (CentOS/AlmaLinux) and see thousands of failed sshd login attempts a day. The severe one: you notice unfamiliar cron jobs, a spike in outbound traffic, or a new user account you didn't create — signs someone actually got in, usually through a weak or reused password on the root account.
Either way, the fix is the same set of steps. Do them in order.
Cause: Password Auth + Root Login Is an Open Door
By default, most fresh VPS images ship with:
- Password authentication enabled — meaning brute-force is possible at all
rootallowed to log in directly over SSH — meaning attackers only need to guess one username- SSH listening on port 22 — the first port every scanner checks
- No automated banning of repeat offenders
None of these alone is fatal, but stacked together they turn your server into a low-effort target. Fixing all four takes about fifteen minutes.
Fix: Step 1 — Set Up Key-Based Authentication First
Do this before touching anything else. If you disable password login without a working key, you'll lock yourself out.
On your local machine (not the server):
ssh-keygen -t ed25519 -C "your-name@yourdomain.com"Press enter to accept the default file location, and set a passphrase if you want an extra layer (recommended, especially on laptops). Then copy the public key to your server:
ssh-copy-id -i ~/.ssh/id_ed25519.pub user@your-server-ipIf ssh-copy-id isn't available (common on Windows), paste the contents of id_ed25519.pub manually into ~/.ssh/authorized_keys on the server:
mkdir -p ~/.ssh && chmod 700 ~/.ssh
nano ~/.ssh/authorized_keys   # paste the public key, save
chmod 600 ~/.ssh/authorized_keys
Test it in a new terminal window before closing your current session. Run ssh user@your-server-ip and confirm you get in without a password prompt (or only a passphrase prompt for your key). If it fails, fix it now — don't move to step 2 with only one working session.
Step 2 — Create a Non-Root Sudo User (If You're Still on Root)
A lot of VPS providers hand you a fresh box with only a root account. Create a normal user with sudo rights before locking root out:
adduser deployuser
usermod -aG sudo deployuser        # Debian/Ubuntu
usermod -aG wheel deployuser       # CentOS/AlmaLinux/RHEL
Copy your key over to this user too — either repeat ssh-copy-id targeting deployuser@your-server-ip, or copy root's authorized_keys into the new user's ~/.ssh/ and fix ownership:
mkdir -p /home/deployuser/.ssh
cp /root/.ssh/authorized_keys /home/deployuser/.ssh/
chown -R deployuser:deployuser /home/deployuser/.ssh
chmod 700 /home/deployuser/.ssh
chmod 600 /home/deployuser/.ssh/authorized_keys
Log in as deployuser in a fresh terminal and confirm sudo whoami returns root before continuing.
Step 3 — Edit sshd_config
Open the SSH daemon config:
sudo nano /etc/ssh/sshd_configFind and set these values (uncomment if needed):
PasswordAuthentication no
PermitRootLogin no
PubkeyAuthentication yes
Port 2222
A few notes on that last one — changing the port from 22 to something else (pick anything above 1024 and below 65535, avoiding common alternates like 2222 if you want to dodge even the lazier scanners) won't stop a determined attacker, but it silences the constant background noise from automated scanners, which makes your real auth logs much easier to read.
Save the file, then test the config for syntax errors before restarting anything:
sudo sshd -tNo output means the config is valid. If you changed the port, open it in your firewall before restarting SSH:
sudo ufw allow 2222/tcp
sudo ufw reload
Now restart SSH:
sudo systemctl restart sshdDo not close your current session yet. Open a brand-new terminal and connect using the new port and your key:
ssh -p 2222 deployuser@your-server-ipOnly close the original session once this new connection works. This is the single most important habit in server hardening — always keep one working session open until you've verified the change from a fresh connection.
Step 4 — Install and Configure Fail2Ban
Fail2Ban watches your logs and temporarily bans IPs that fail login too many times. Install it:
sudo apt update && sudo apt install fail2ban -y      # Debian/Ubuntu
sudo dnf install fail2ban -y                          # CentOS/AlmaLinux
Never edit jail.conf directly — it gets overwritten on updates. Create a local override instead:
sudo nano /etc/fail2ban/jail.localAdd:
[sshd]
enabled = true
port = 2222
filter = sshd
logpath = /var/log/auth.log
maxretry = 4
bantime = 3600
findtime = 600
On CentOS/AlmaLinux, set logpath = /var/log/secure instead. Save, then start and enable the service:
sudo systemctl enable fail2ban
sudo systemctl restart fail2ban
Check that the sshd jail picked up your settings:
sudo fail2ban-client status sshdYou'll see a count of currently banned IPs, which stays at zero until someone trips the limit — that's normal on a fresh install.
Prevention: Keep It That Way
| Habit | Why it matters |
|---|---|
| Never share private keys over chat/email | A leaked key is as bad as a leaked password |
| Rotate keys when someone leaves the team | Removing a line from authorized_keys takes seconds |
Check fail2ban-client status sshd monthly | Confirms the jail is actually catching attempts |
| Keep one root-equivalent recovery path (console access via your host's control panel) | Backup access if you ever lock yourself out over SSH |
| Apply the same key-only rule to any new user you create | One password-auth account undoes all of this |
If you're on a SkyServer VPS, you can always reach your server through the browser-based console in your control panel even if SSH itself becomes unreachable — worth confirming that access works before you need it, not during an incident.
Frequently Asked Questions
What if I lock myself out after changing sshd_config?
Use your hosting provider's browser-based console (VNC/serial console) to log in locally without SSH, then revert the change in /etc/ssh/sshd_config and restart sshd. This is exactly why you should never close your original session until a new connection is confirmed working.
Is changing the SSH port actually useful, or just security through obscurity?
It's not a real security boundary on its own, but it dramatically cuts the noise from automated scanners that only check port 22, making your logs easier to monitor and slightly reducing your exposed attack surface. Pair it with key-only auth and Fail2Ban — don't rely on it alone.
Can I use password authentication for one specific account and keys for others?
Yes, using a Match User block in sshd_config, but this reintroduces brute-force risk for that account. It's better to issue that person a key too — key generation takes under a minute.
Will Fail2Ban ban my own IP if I mistype my password a few times?
Yes, if you exceed maxretry within findtime. Add your own static IP to the ignoreip line in jail.local (e.g. ignoreip = 127.0.0.1/8 203.0.113.5) to avoid banning yourself.
Do I still need a firewall like UFW if I'm using Fail2Ban?
Yes — they solve different problems. UFW controls which ports are reachable at all; Fail2Ban reacts to repeated failed attempts on ports that are open. Run both together for layered protection.